
Before You Start: 3 Things You Need
1. An Idea
Answer this question: After finishing the game, what should players feel, learn, or do?
2. At least one image
A background or character sprite (stock image, hand-drawn, or AI-generated).
3. An Octokit account
Sign up for free at octokit.io (no credit card required).
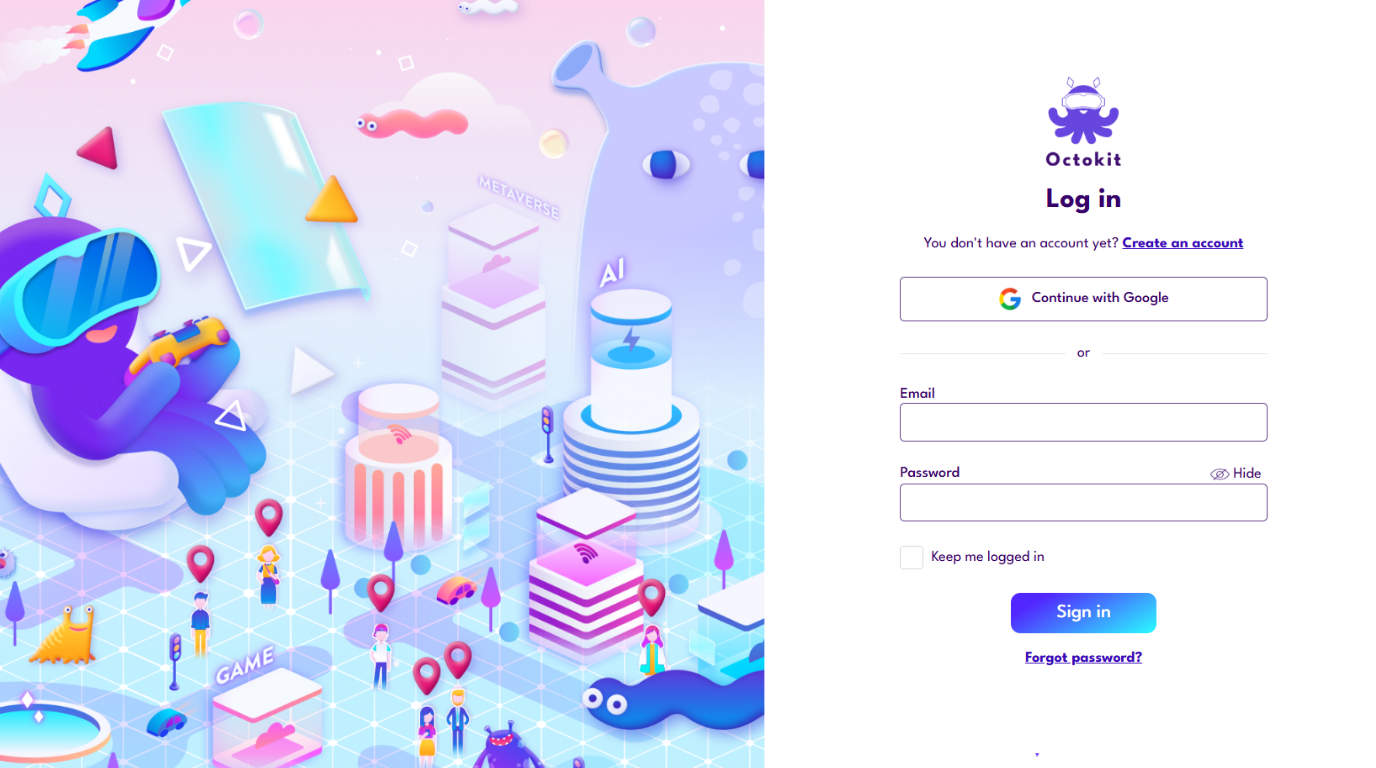
You just need to sign up an Octokit Account, for free!
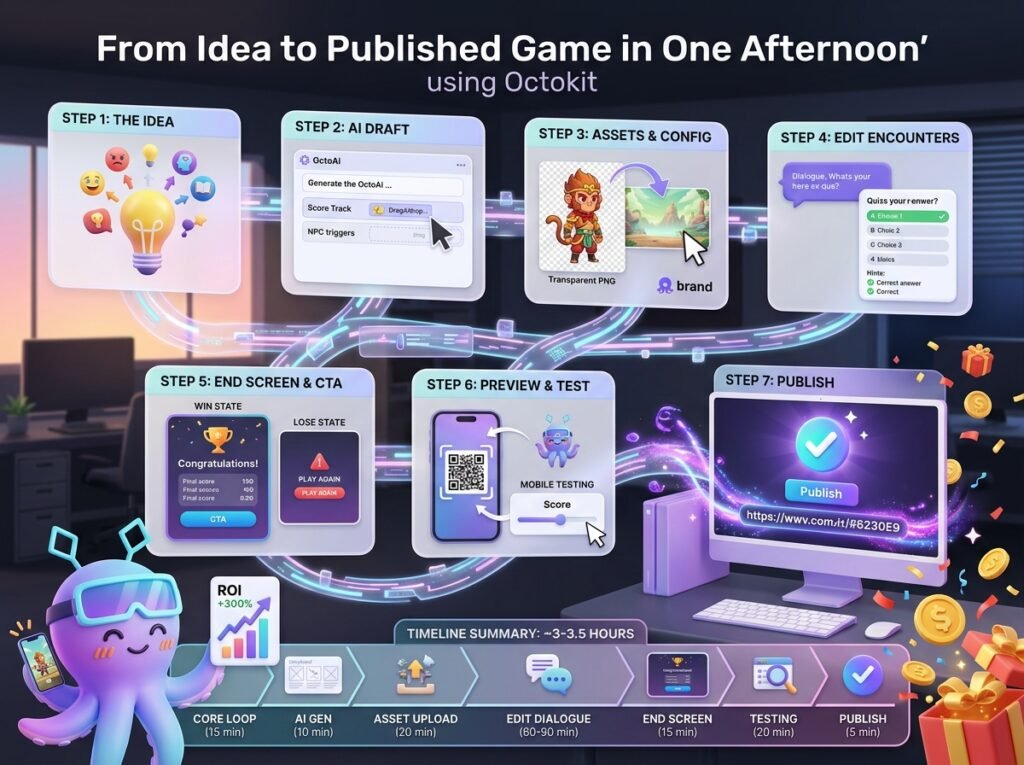
Step-by-Step Workflow
Step 1: Define the Core Loop (15 minutes)
Write down answers to these 5 key questions:
Main character: Who are they and what do they want?
Challenge: What creates obstacles? (NPC, rival, riddle, etc.)
Journey: How many milestones? (3 checkpoints for short games, 5 for longer ones)
Reward: Emotion, knowledge, or items (voucher, code, etc.)
Share moment: What will players share after finishing?

Step 2: Use AI to Generate the First Draft (10 minutes)
Use the Generate with AI feature in the Octokit editor tool.
Enter a prompt based on your core loop.
OctoAI will generate:
- Score Track structure
- NPC triggers
- Dialogue draft
- Quiz suggestions
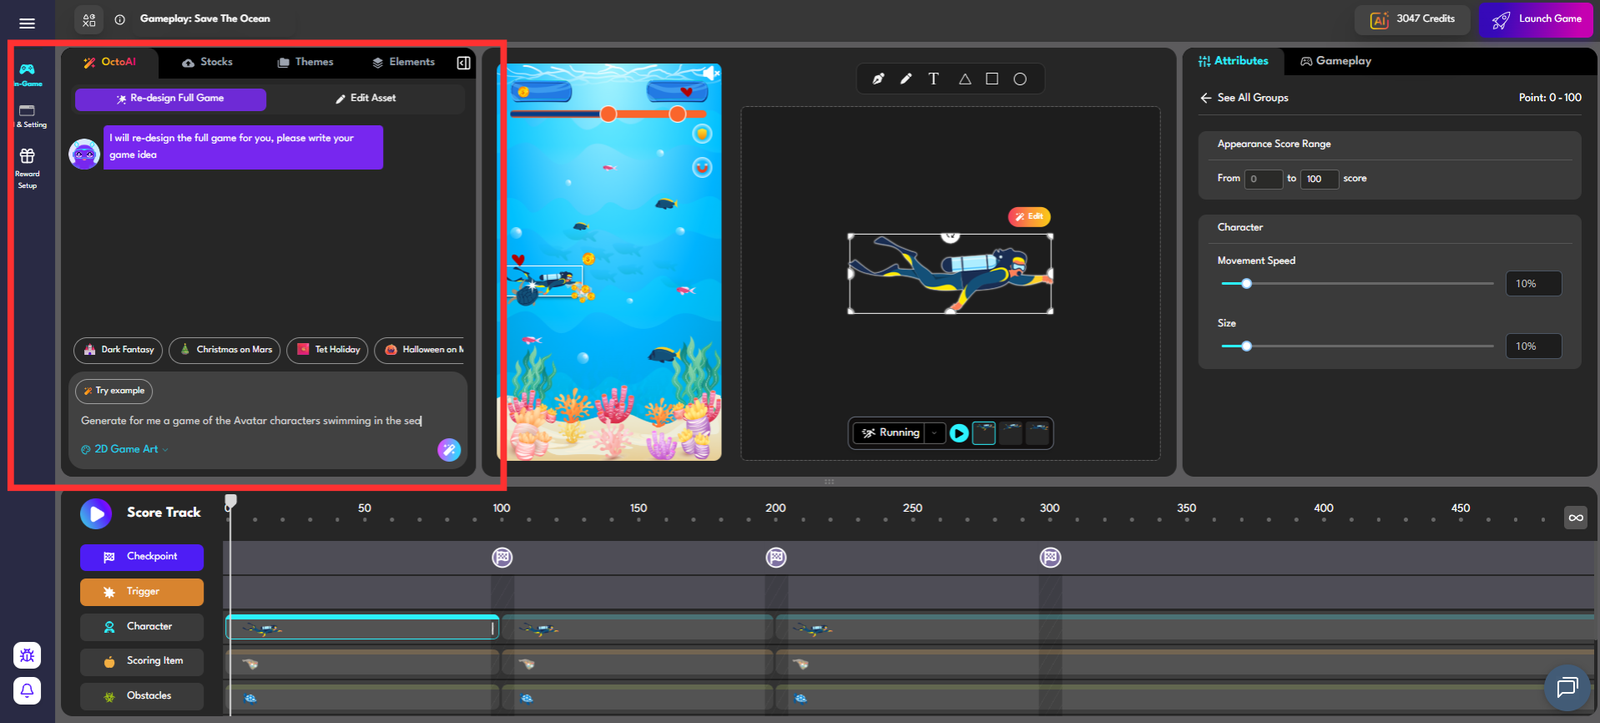
OctoAI will do all the hard works for you
Step 3: Upload Assets & Configure Characters (20 minutes)
Background
Upload an image (recommended 1920 × 1080 px) and set it in Game Settings.
Characters
Upload transparent PNG files, name them, and assign them to triggers.
Visual Settings
Apply brand colors and upload your logo if needed.
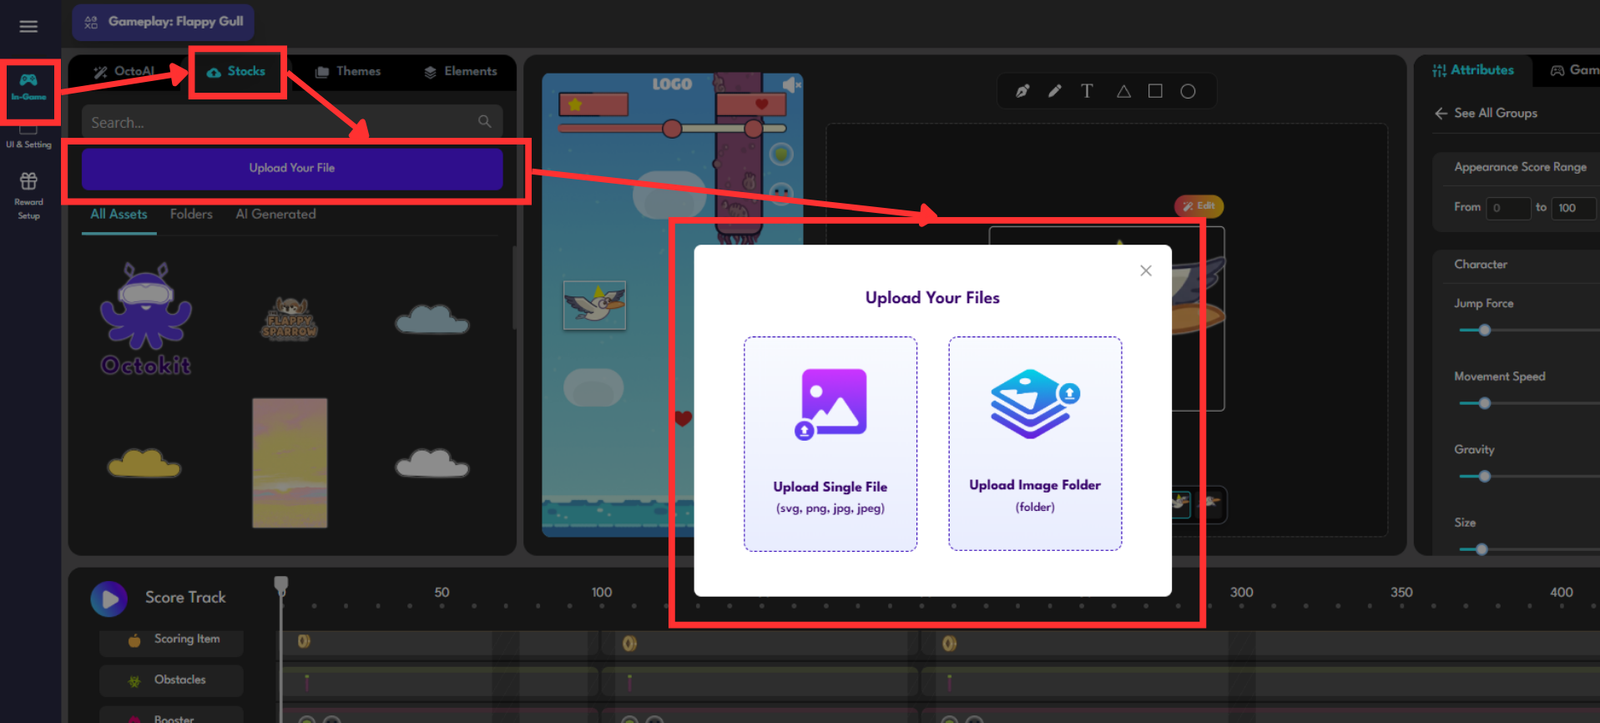
Upload your game assets in Stocks panel by clicking Upload Your File, then choose to add a single image or an entire folder to quickly populate backgrounds, and UI elements
Step 4: Edit Dialogue & Encounters (60–90 minutes)
Opening dialogue
Check tone, hook, and length (recommended 2–3 sentences).
Quiz / Interaction
Use clear questions with 4 options:
- 1 correct answer
- 3 plausible distractors
- Add hints for wrong answers
Post-quiz dialogue
NPC responds based on player choice and leads to reward.
Reward
Define clear reward messaging and appropriate score.

Now is the time to breathe life into your project with your own creative flair
Step 5: Setup End Screen & CTA (15 minutes)
Win state
- Clear congratulations message
- Final score summary
- CTA button (claim voucher, view portfolio, share result)
Lose state
- Encouraging message
- “Play Again” button
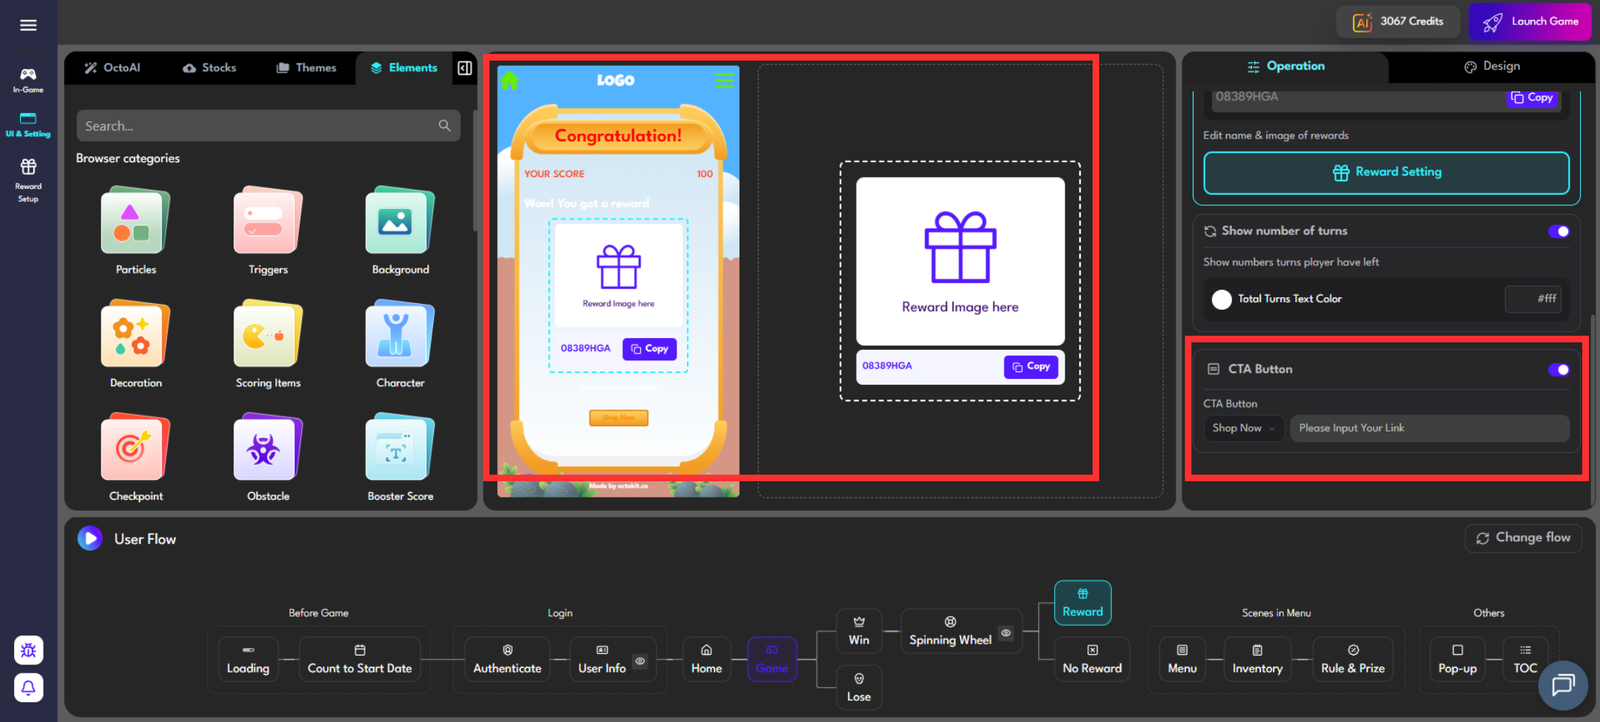
The CTA feature allows you to direct users to your brand’s social media pages or purchasing website, encouraging further engagement beyond the game.
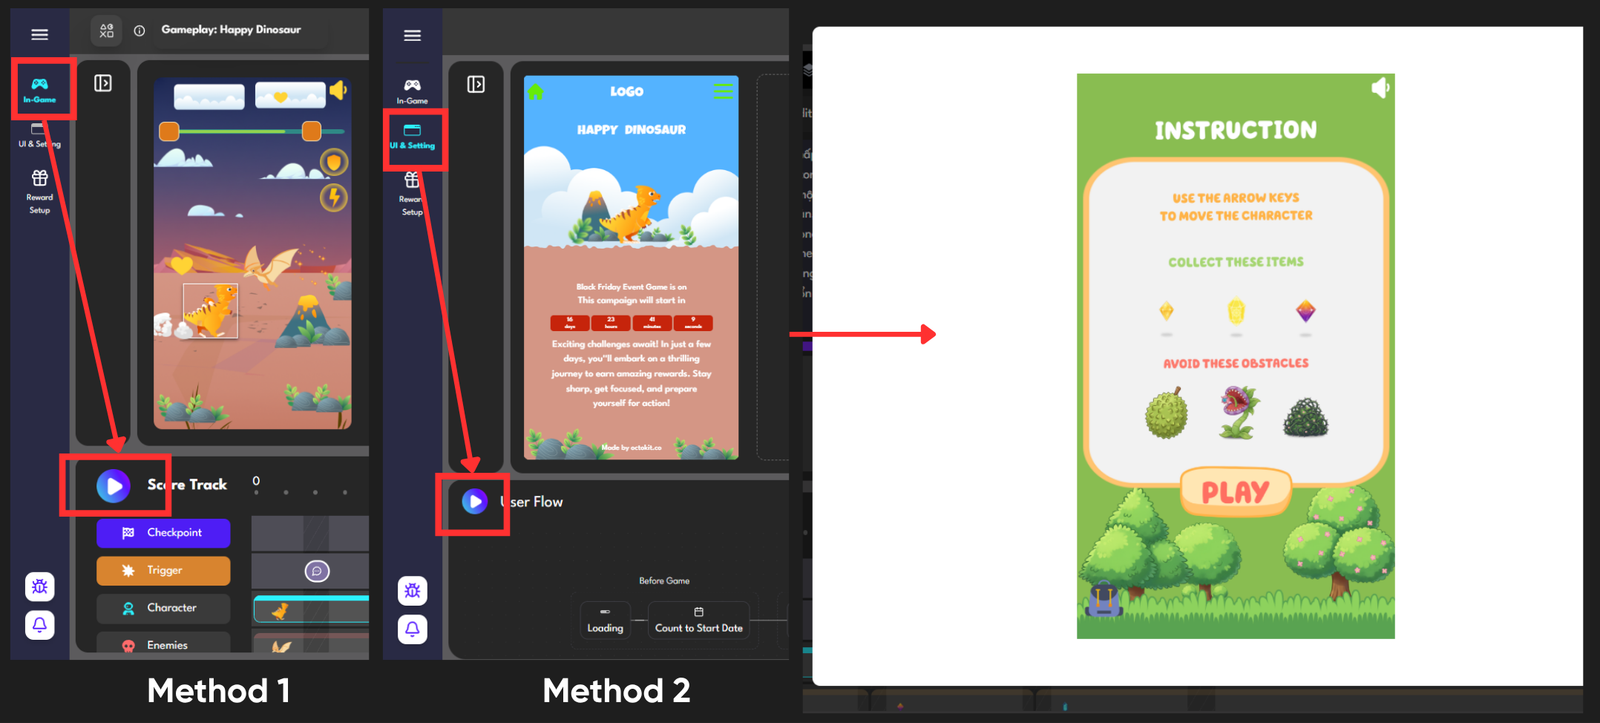
Step 6: Preview & Test (20 minutes)
Use the Preview Button appear at the bottom panel to check out your Gameplay.
‣ Quick tip: You need to test:
- The entire gameplay
- Correct answers and Wrong answers in your Quizzes or Survey
- Characters and Environment changes
- Dialogue flow
- Checkpoint and Triggers Placement
- Scoring Items
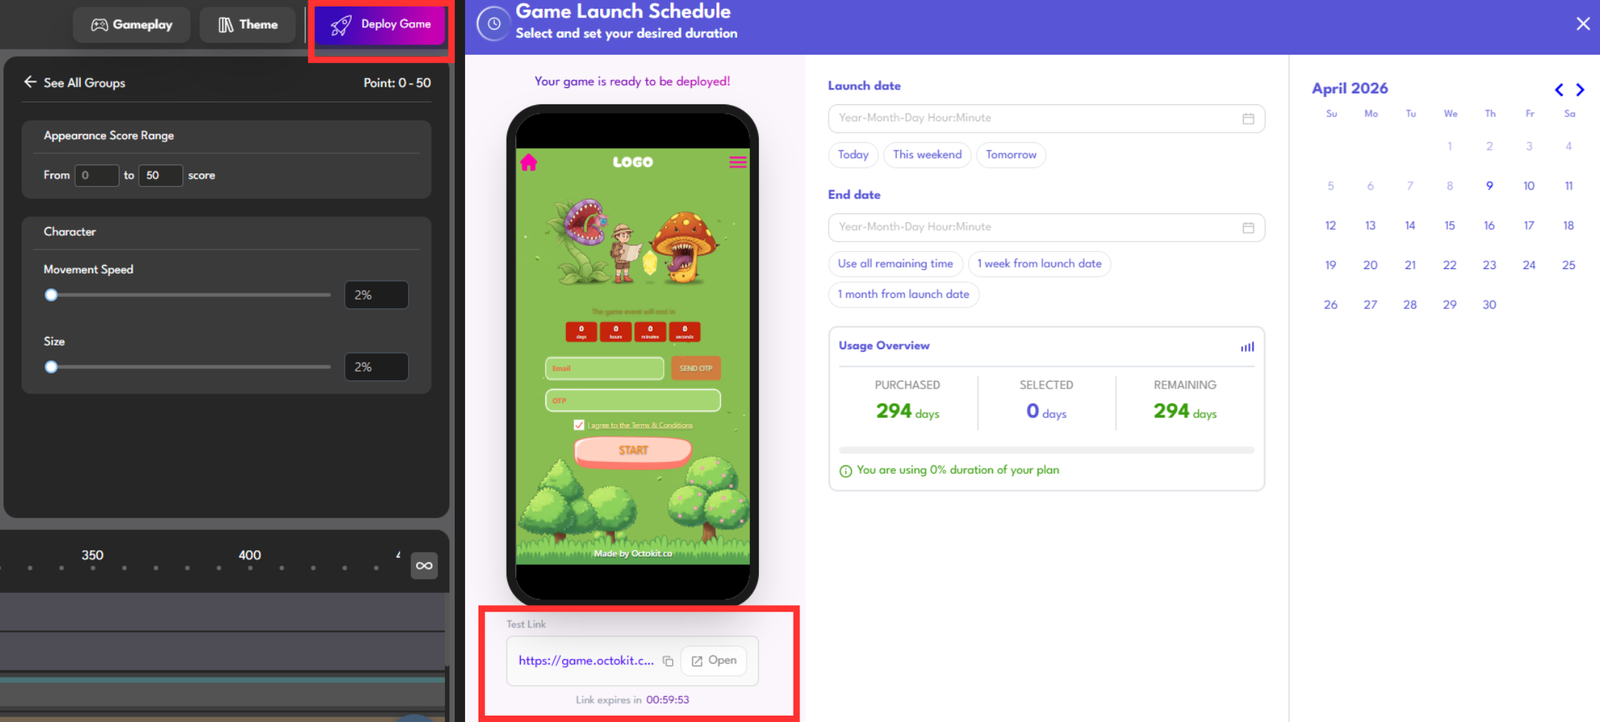
Moreover, you can also preview all the gamification campaign flow using the Test Link Feature to test out on Mobile and Desktop Version:
‣ Select Launch game Button at the Top Right of the Editor Tool
‣ Click Copy Test Link to check out your whole game journey
|
Quick Mention: You need to refresh the Test Link every hour since it would be expired. And you cannot use an expired link! |
This step is really important, since this will be how your customers see and interact after entering your game
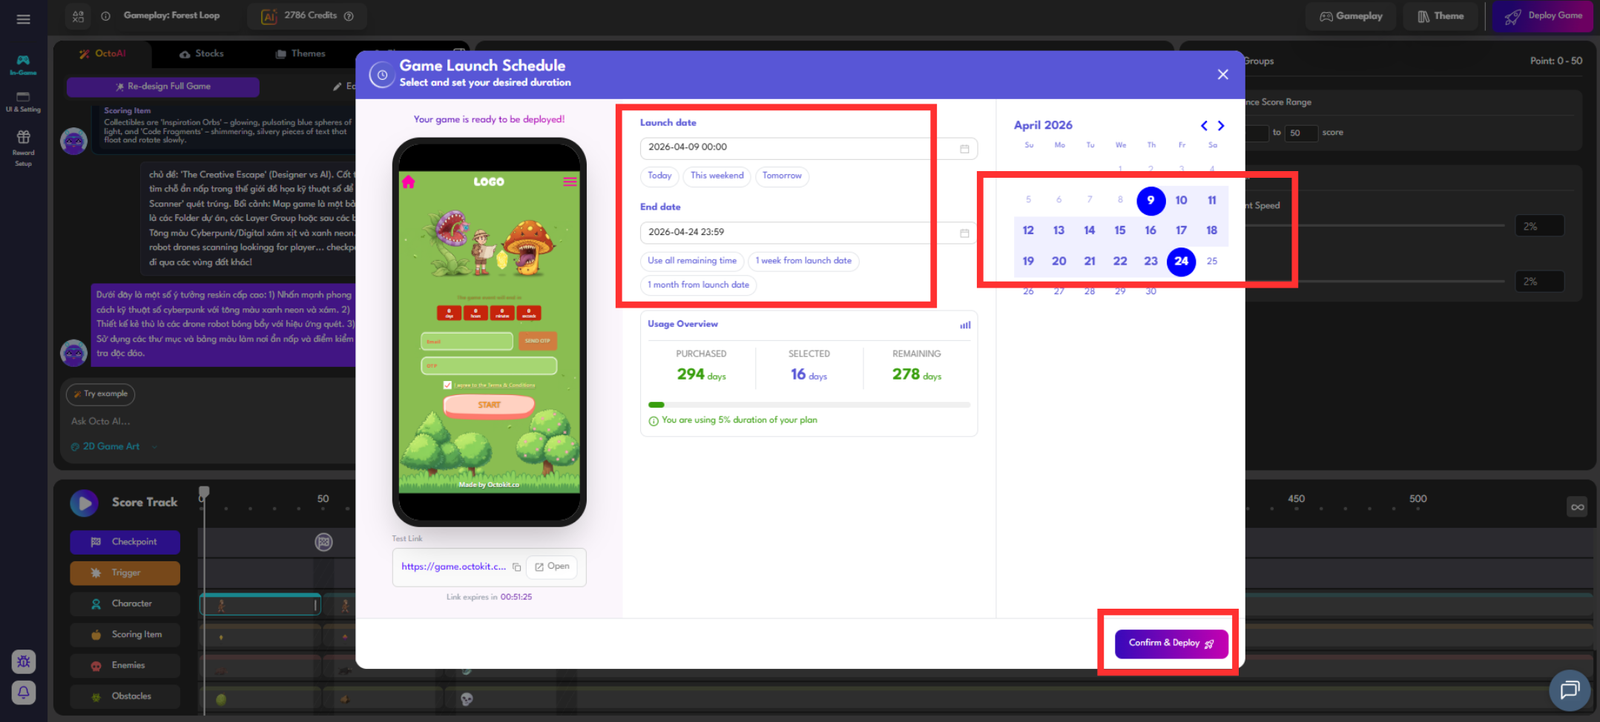
Step 7: Publish (5 minutes)
You need to fill out all of the Game Timings before making the official purchase to publish your game.
Choose visibility:
- Public
- Unlisted
- Password-protected
Copy the URL and test in an incognito tab.
Timeline Summary
| Phase | Time | Output |
|---|---|---|
| Core loop planning | 15 min | 5-question game brief |
| AI generation | 10 min | Draft scoretrack + dialogue |
| Asset upload + config | 20 min | Visual setup done |
| Edit dialogue + encounters | 60–90 min | Story polished |
| End screen + CTA | 15 min | Full game flow |
| Test + debug | 20 min | Bug-free game |
| Publish | 5 min | Live URL |
Total: ~3–3.5 hours
Result: A live, playable game
Distribution Options
- Direct URL
Share via Facebook, Zalo, email, or QR code. - Embed iframe
Embed into your website using HTML. - QR Code
Octokit automatically generates a QR code for print, standees, and events.
FAQ & Notes
‣ Do I need coding knowledge?
No. If you can use Canva or PowerPoint, you can use Octokit.
‣ Can I edit after publishing?
Yes. Dialogue, quiz, and rewards can be updated anytime.
‣ Language support
Full Unicode support, including Vietnamese.
‣ Game duration
Free plan: limited live duration, and limited players
Paid plan: unlimited live time